Thursday, June 28, 2007

The Paper (part III)


It is curious how an investigation brings things up. As you are reading new sources and getting some info, a book falls into your hands refuting facts that you considered for sure, clear and concrete. This happened to me with “Properties of Paper: An Introduction”, published by TAPPI (Technology Association for Pulp and Paper Industry), from authors James C. Abott and Stanley Trosset; a fantastic book, even when it is more oriented to industrial papermaking on USA, leaving behind artistic uses and handmade paper.

So much new information, incomplete matters, that I've been forced to speak a little more about nature of paper and its making.

We already said that main source for cellulose is treewood. Also saw that together with cellulose other elements coexists in plant's cells, like Hemilcellulose and Lignin. However, reading this book I've learned that Lignin works as a binding agent between fibers and that its concentration grows in the outer layers of the cell, contrary to what I said in the previous entry. In fact, it is necessary to remove lignin to free the fibers in an homogeneous solution, since it concentrates on the outer walls of the fiber isolating it from others, reducing the number of possible contact points between them (which are what generates the "bond" characteristic of paper). Lignin has a very complex and variable chemical structure, it is insoluble in water but can be disolved on certain acids solutions.

As a tip to whom desires to cook their own pulp, an agent that disolves lignin (not very efficiently but it works) is popular caustic soda in water. Its efficiency improves in pressence of high temperatures and pressure (but to use a pressure cooker with caustic soda is extremely dangerous!). Do not worry about cellulose, its chemical binding is strong enough to all acids except a few number of strong ones.

The other component, Hemilcellulose, is a polymer similar to cellulose but with slightly different molecular arrangements; is important in paper since it stimulates creation of fibre to fibre contacts and in its water absorption hability, however, it doesn't resist the lignin elimination process.


Then, if you want to make housemade paper, forget about tree wood and look for a plant with low concentrations of Lignin and fibres not too longs (that leaves out cotton), because that will result on a too resistent paper, like cloth, hard to fold (don't forget that the mark of a fold is given by the fracture of the fibre).

Also because the fact that papermaking from tree wood has become an extremely contaminant process just for the use of chemicals in the removal of lignin, and it is in that way because the low costs induced by wood and the chemical usage. Among the ways to produce cellulose there is the pure mechanical (as stone groundwood and Refiner Mechanical Pulp), constituting 10-15% of world's paper production, their disadvantages are the difficulties to obtain an uniform and homogeneous pulp, the breaking and damaging of fibres and paper's short lifetime, reasons because it is used mainly for newspapers, catalogs and light publications.

Lignin gives paper and pulp a characteristic brown color. It's important to understand that is impossible to remove all lignin from pulp, so all pulps coming from tree wood have that characteristic before the bleaching process; kraft paper has that colour only to the absence of the bleaching stage and it is a pure chemical pulp process.

As we talk about pollution, the whole process of papermaking is extremely water and energy consuming and, even when enormous advances has been developed in the reusage of water and chemicals to reduce that fact, it is far away from being reasonable for nature., all that leads us to the need of minimize the use of paper in our regular life and to respect and love the piece of paper we hold in hands, because the cost and sacrifice that it meant.


Properties of Paper

At last I think we can enter the land of the physical and structural differences between the different types of paper. The Characteristics of paper are Structural and Mechanicals, in the next posts I will talk about each one of them.

Structural Properties are:

Grammage
Formation
Thickness
Directionality
Two-sidedness
Smoothness
Porosity

Grammage

In industrial terms, weight of paper is measured by fixed packages of a given number of sheets and standard sizes for them, which makes thorny and difficult to make any comparative analysis between different kinds of paper; for that reason, the International System of Measurements (SI) established the mass content in a single sheet of known area, or grammage (grams per square meter, g/m2) as the mass - characterizing value for paper.

Typical values of grammage for paper are:


Formation

Formation on paper refers to uniformity in the distribution of the fibres and other components along and wide the sheet of paper; it is in the pulp sheet making stage when this is controlled.

Thickness

Thickness (or Caliper) is a vital parameter but commonly undervalued by designers and folders, who normally looks for the thinness possible piece of paper to its much complex models, specially for the box-pleated ones. There is a tendency to believe that thickness of paper is negligible and it will not affect the geometry and symmetry of the figure, nothing further from reality, specially when folding lots of layers together.

It is obvious that the maximum number of layers to be folded together is related with the thickness of the paper. However, there is a physical limit that show us to understand the real importance of it when folding any sheet. To illustrate it let's exaggerate the thicknes and see how many layers creates long and wide concentric circumferences around the fold; the long the number of them, greater the amount of paper they take away from the model.


The calculations of these diameters were done by an american mathematics student (now teacher) called Britney Gallivan on Dec 2001, getting a numeric series and a formula to obtain the needed long L for folding a piece of paper of thickness t a consecutive number n of times:


For example, regular thickness of a bond printer paper is 0.1 mm, let's assume we want to fold it 10 times over itself, we will lose exactly 55.036036 meters! of paper only in the foldings...

She achieved a world record folding a sheet over itself a number of 12 times (for curiouses our bond paper should be 880 meters!!, nearly a kilometre!).

Regular values for thickness are given in the next table:


An important parameter results from diving grammage by the thickness of a paper, called apparent density, thinner papers but with high grammages can be more resistant to tearing; generally is in compression stage when this characteristic is achieved. We will see this when mechanical properties are reviewed.

Wednesday, June 20, 2007

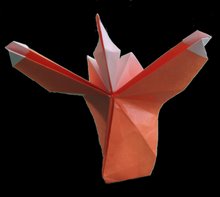
A flying Condor (my first design)


Hi,
I've decided to give me (and you) a small break while preparing the next entry about paper and folding (which is almost ready), and share the amazing experience of my first designed model. Last February, during Roman Diaz workshop on Purranque, I've came to the idea of designing this bird, because is a magnificient and gorgeus animal and also because there is not many models flying around about it.

Loyal to that workshop, I enlisted the main objectives I wished to accomplish in an order of priorities:

  1. it should be a flying condor, with its wings opened in glide.
  2. have a color change to provide it with a white neck, characteristic of it.
  3. with its legs withdraw in flying position (I love birds with their legs, they give the model a felling of completitude, even if the figure is not completely closed)
  4. With its long feathers on the top of the wings, also characteristics of its specie.
  5. should be an ellegant and have an easy look, not too carrion-like.

the first two conditions were out of the question, so I felt into them. First one influenced strongly on the base choice; if I wish long extended wings, I should use preferently the main diagonal of the square and the other two corners for the head and tail. Soon I got one good answer from the figures I've folded until now, Anibal Voyer's pegasus base:


If I folded AB and AC with valleys not only I'll get a couple of long wings and enough paper for head and tail, but also being slightly inclined folds I'll obtain a 3D curve bending the wing down on flight.

Then there was the head problem and its famous color change, as I had to reduced the top triangle to the center of the model, since Condor's heads are much smaller than their wings, I had to hide paper in wing's frontal edge, which nevertheless gave them a thick axis to enforce their shape and whole forming and posture. Hidding three layers resulted on a small white triangle in the center of the model. But when I folded front and closed that triangle I couldn't find any way to produce the color change to create the white neck without sacrificing the usage of the top corner for the beak or getting a too wide neck to the edges of the wings. After many weeks and models folded, finally I founded a trick and a solution


I passed into the wings and their finger like feathers problems, box pleating fingers didn't help me, because they produced long layered bands along the wings. I was again lost until I saw Román Díaz's Kingfisher, which probed me that best solutions often are the simplest, with feathers suggested by simple marking them, giving me this result:


pretty OK to me. Still, after watching this eagle from Nguyen Hung Cuong, I tried to test overlaying of flaps, which I definitely chose.

And the tail. I tested many different tails and the solution I liked the most was an achordeon or semi box pleated one, which gave the model some ellegance, at the time that simulates rear wing feathers and hide the inside of the model, but I'm not totally decided.

This Condor still needs a lot of work and developing, details like the head comb (which I think I'll get enlarging and trimming the head) but no doubt it has teached me a lot. I'll fold it in a better paper and more finished and post it in the future weeks, I hope you like it and also looking forwrd to know your opinions

Many regards.


Wednesday, May 23, 2007

The Paper (part II)


I've planned to speak a couple of things about the effects on paper of folding but then there are still one or two things still to say about paper itself and its making. Most of this comes from the fantastic Michael G. LaFosse's book "Advanced Origami" and his project Origamido.com, book which is an ultimate guide to become an artisan of papermaking and origami.

Cellulose

Continuing with our approach to paper's nature, in the first part we mentioned cellulose and its discovering in 1852 by Meillier; however, some sources points to the french biogolist Anselme Payen as the first person isolating cellulose from wood [1, 2]. This element constitutes the main component of plant's cells and is important to origami since its atomics bounds promotes the creation of long molecular fibers. Looking at the cellulose molecule (C6 H10 O5)


is possible to note that their free OH radicals can generate a very strong H2O bound and also an oriented chain, which is the origin of vegetable fibers, the greater the number of cellulose molecules bounded on this way (known as a polysacaride) the greater the resulting fibers will be and, as we saw previously, this is vital for paper strength. The cotton rag that surrounds the fruit has the purest vegetable cellulose fibers in nature and they can hold until 6000 molecules in a polysacaride. This bound is so strong that only herbivore's digesting systems can break. As an interesting fact cotton fibers can size up to 3 cm when pine wood fibers only 3 mm.

Normally first wall on plant's cells contain pure cellulose and when going deeper inside different components appears, as lignine. Next table (sorry, in spanish) shows the % contents of different types of plants:


Source: TAPPI

all this extra elements affect badly to paper's quality and lifetime and different procedures has been created to extract them from the plant, many of them chemical and heavily toxic to the environment. That's the reason why paper factories are eyestorms for nature's defending groups all over the world, since this factories throw their industrial waste normally to rivers or seacoasts, together with the fact that they change natural flora by pine trees, which roots have an strong factor of fertile earth's destruction but a shorter and cheaper time of growing and development as adult trees.

As we said, in 1852, american Benjamin Chew Tilghman patented the method to obtain cellulose from wood, by the chemical creation of cellulose sulfithe. In the world, main trend is to obtain cellulose from this source (woods), except for India (only a 40%) and China, which obtains 80% of it from other plants [1].

Finally to say that cellulose molecular bound is so strong and closed that paper is more rigid in one direction than the other, and as LaFosse says in his book if you hold a square by one edge it inclines down lower than if you hold it by the next edge on its side, because fibers trends to align in a direction. Also cellulose in insoluble on water and, when water is added to paper, fibers grow wider, not longer, and that's the reason because paper doesn't get bigger and wrinkles appears on its surface (an important fact when you try wet folding).

Beating


In Part I we saw that long fibers creates a resistant but rough paper and short fibers a softer and fine one. The chemical process to separate cellulose from plant leaves untouched and separated fibers, so if you want to get fineness it is necessary then a beating and agitating stage. This is achieved by the usage of mills and pulp circuits, most common of them is the Hollander mill (image above).

It is basically a water-pulp circuit plus a rotating mill with square gears that reduces the passage area of the liquid, beating the fibers, cutting and spreading them in the solution.

As long the time the pulp is beated, the greater its opacity and fineness of the resulting paper, also its fragility (normal paper is beated for a couple of hours and tissue paper could be more than 8 hours in the process).

The Pulp Sheet

Once the pulp solution leaves the Beating, it is possible to color it by adding retention agents and pigments. Then is necessary to create a layer of homogeneous pulp which will become the sheet of paper. One way to do it is water mixing and depositing it in a rectangular frame, as cellulose doesn't dissolve in water, it evaporates and leave the pulp layer, of course if you use a frame with a filter screen at the bottom in a way that water drops down the process is accelerated and improved. Industrial paper making spreads the wet pulp in long lines of production which controls its thickness and density.

Pressing

The wet pulp sheet is then pressed according to desired degrees of density required for paper. Here we look again at cellulose fibers since if they are smashed the area covered by them increases and also the pulp density and bounding, making paper with bigger opacity and shapping, as you can see in the next images. Some water is extracted from pulp in this stage also but normally sheets are placed between wet felts.


Driying

Finally paper is driyed by hot air until it keeps its color and natural humidity. Also it is possible to give it some finishing with special surface paints, as for shinny continuous surfaces.

This far we will reach about the processes of paper making, in next posts I will try to talk about the effects on paper of making different types of folds, as long as the effects on stress and recovering of paper and fibers, I hope you are finding this journey interesting so far ;)

Bibliography
1 http://web1.caryacademy.org/chemistry/rushin/StudentProjects/CompoundWebSites/2000/Cellulose/history.htm
2 http://en.wikipedia.org/wiki/Cellulose
3 http://www.forestprod.org/cdromdemo/pf/pf8.html

Sunday, April 29, 2007

Her Majesty the Paper (Part I)


Frequently people ask me about what kind of paper I prefer to fold one or another model, if I have a preferred generic one, or if there is a "traditional" or "classic" paper from Japanese origami and what gives it its "special" condition. Then I gave answers like "to complex figures and very detailed is better to use tissue foil ", or "if I want the models to keep their shape in time you can use metalized paper", or "kraft paper is good if you want to wetfold or fold with brush". And everybody get happy thinking how much I know about this handcraft; everybody except me of course who realize that in fact I don't have a clue about what paper is, nor how it works, or why it has this or that quality.

How much knows an origamist about the paper he uses, how it was made, what's the secret that keep it tight and how to select the best for their purposes? And what about the making processes of paper and the ecological problems they mean to nature?

So I decided to do some research.

Maybe a good starting-point should be what paper is not. Word came from latin papirus which signed the plant which were used by the egipcians to make their famous writing rolls .. However, yet the principle is the same, paper we know and use today doesn't have its origins there. Papirus is a plant with long leafs, soft stalk and a triangular wide base and the rolls were made directly from its medulla, a paste which is spread over molds and hydrated with water, pressed and the left dry, to finally be rubbed with ivory or shell to soften its surface. Its origins goes back until 3000 BC and its use s to Greece and the entire Rome Empire until the Vth century. After that, writing was done over parchments, made from fine layers of cow, sheep or ram leather(1).


The true origin for paper lies on China. Around AD 105, emperor Ho Ti ordered his eunuchs chief Tsai Lun the study of new materials for writing, since the wood tablets and silk patches were unpractical for the growing usage of writing. His work concluded with the making of a vegetable pulp made with fibers from bamboo cane, mulberry and other plants, along with the development of a procedure for the making of the paper, which was kept absolutely secret for more than 500 years.

Only after AD 500 the technique of paper making passed to Korea and in AD610, priest Ramjing traveled to Japan for bringing assessment in the production of paper; both countries will upgrade it according to their own resources and technology (in AD700 rice flour was added to the pulp). In 750 it passed to Central Asia, Tibet and India, to finally reach the Arabian world and his vast empire, which ran through all Northern Africa until Spain in Europe.

Here there is an important change in the technique. Arabs, not having many fresh plants, started to use clothe fibers and to recycle materials like old carpets, tapestry or damaged cane products. Pulp then obtained produced a finer paper but with a shorter life; also they incorporated starch, which improved its resistance to the stroke of writing. The first workshop installed in Europe was in the Hispanic Arabian city of Cordoba in AD1036.

Perhaps it is a good moment to start explaining what is paper and how does it work. It is a irregular structure formed by entangled fibers in a paste which is hydrated and left decant in a layer relatively homogeneous. The size of the fibers plays a main part to achieve some properties in the paper; long fibers will give it strength and rigidity, but with a rough finish, and short fibers will produce fine paper, formed, flexible, textured and opaque, but not resistant, better for writing. In mixture of both fibers lies the secret to obtain specific results.


a)raw white paper (1000x), b) secondary cellulose fiber (400x)

secondary cellulose substrate (200x)

With Crusades the manufacturing process arrived to Italy, country where it was incorporated to it a glossy finish with animal grease that gave paper a great surface resistance, which allowed the sharp scribe's pens (made from feather) to write without wrapping it, this made the parchment to disappear very quickly from Europe. The writing technique with feather, dominant in Europe, against the calligraphic brush painted one in the East, determined the final differences between European and Chinese-Japanese paper (2).

With the creation of the printing press on XVth Century, needs of paper grew explosively and clothing resources started to lack, and also hands to do it. In 1798, french Nicholas Louis Robert created the first effective paper machine, which was improved later on 1803 by english brothers Henri and Sealy Fourdrinier. They incorporated on 1840 the crushing of wood to the making process of the pulp. Finally, on 1850, the chemical process to produce pulp was created, which made the production much cheaper. On 1852 Meillier discovered cellulose and Tilghman patented the process to obtain it from wood. Just on 1853, the circle was closed, when paper machines arrived to China and Japan, country that produces the 15% of world's paper needs.


Bibliography (in Spanish):
(1) http://www.papelnet.cl/papel/papel.htm
(2)http://www.papelerapalermo.com/oficios/art-sobre-como-llego-el-papel.asp

Friday, April 06, 2007

My workshop in Purranque: The Kawasaki Rose


A classic figure in origami is the rose created by Toshikazu Kawasaki from his famous twist folding. Its delicate curve petals had made it one of the most popular and spread models inside origami (and outside).


History of this rose is easier to build than the one of its author. There is very few about this japanese mathematician, who teachs in the Sasebo Technologycal School and became the first "Doctor in Origami" of History. He is also known for his theoretical studies about the relationship between origami and mathematics, developing, among others, the Theory of Iso-Areas (Mirror Areas). In 1998 he pulished Roses, Origami & Math (which should be now on its way to my home :) )


On this book there is a complete chapter dedicated to this rose and its variations, being this the first version "from the author" of its diagram. Before, in 1994, during the New York Convention, Kawasaki teached the rose to the american creator Joseph Wu and he folded and gifted one to his friend Winson Chan. He unfolded the gift and developed a folding sequence and diagram, which was published and spread trough the net, becoming very popular and known as the "New Kawasaky Rose". Later, japanese Kunihiko Kasahara published in his book "Origami for the Connoisseur" a diagram a little less elaborated than Chan's and called it the "Original Kawasakai Rose". Many other variations has been created over this three diagrams, to get a larger number of petals or diferents finishing details, but the heart of this figure, the twisting fold, remains unvariable as a testimony of the geniality of its author.

Chan's diagram remains being my favourite, mostly because its final result and also I guess because sentimental reasons (it was one of the first figures I've memorized and gifted) However, I have to admit that its 22.5º grid pre-folded takes out all ellegance to the next steps in the folding. Here there is a video about how the rose is collapsed from its pre-folded CP.


It is precisely the analysis of the New Rose what gave the folder a deep learning about the relationship between geometry and origami. To build this rose is almost being creating, step by step, the CP of the figure, to collapse it then in a couple of master moves. The point I want to remark is that anyone who has folded this a couple of times can realize that the pre-folding of the grid is unnecessary to get tits main folds (step 12 of Chan's diagram). The perfect geometry of Kawasaki give us a large number of references to achieve every one of them from two simple diagonal lines at 22.5º. This is especially useful when you use thick papers o textured to fold the rose, because Chan's method to draw the grid lose accuracy over the edges.

With this in mind, and studying a little, I could develop a diagram to get the full figure from a couple of reference lines, including the secondary petals from steps 9 to 11 on Chan's diagram.

For example, to generate folds from Chan's step 12, it is only necessary the axial line and a reference point, aligning the line over itself and marking the fold passing through the reference point, as I show in the next image:
Is when I remember my old Maths teacher at school, saying by memory: "there is one and just one perpendicular line to a given line which passes through a given point". That can be read as an Origami Theorem: "To fold a perpendicular line of a given one is necessary only that line and a given point"

There are also other references to follow in this particular fold, as I show them in the image above.

Same thing occurs with the other folds from that step:


My hope was to get the rose whit the less possible number of foldings, to get the petals as much clean as possible, but at the end, just a few of them can be avoided. Also the sequence itself is as complicated as Chan's (or even more). All I could keep was the great experience of having learned a lot and grown-up in my relationship with folding and geometry, both things which justify the experience and that's why I share it to anyone who desires to try it. This is the link to the document Google Base page and thi is the direct link to the document (it is zip pdf file and its size is about 1 Mb):

newrose2.pdf.zip

Many regards and luck if you try it :), I'll be happy to answer any question about it.

Monday, March 26, 2007

Roman Diaz Design Workshop


Art is a fine dialogging system between humans. Exposing a creation in which has been (deliberately or not) placed a message and a sense, makes the audience to read and translate it into its own coded experience of reality (H. Maturana says the only reality we can be sure is ours, as autopoietic, independent and isolated beings). And one of the most used mechanisms to achieve this dialog is the Representing act, which is the reproduction by a mean (visual, textual, etc) of what can be perceived as real.

In that sense, what calls our attention on a painting of a horse? What tell us that its markings are actually a horse? its standing, its attitude? That make us to remember something of the past? Or its global message, inside an scene? Or maybe its degree of realism and exactitude? What make us to experience the "click" that triggers an emotion? The act of Representing then lies on the deepest places of human’s ways of art.

And Origami is not out of this, when modular and geometric origami talks us about perfect forms, unnatural forms, or remembering the fragility of mortal and organic nature by opposition, the figurative origami exercises the representing of the daily and real nature.

So what's the figurative designer looking for? a living creature? and how does he achieve that? by reproducing an standing or attitude, by the realism or exactitude (as we said before), by any characteristic detail, like the big pincers of the crab, or the sad big eyes of the panda? It is clear to me that there are as many answers as ways to watch and observe the reality, the important thing then is to achieve the dialog. Is also clear that every designer looks for different an own objectives in the time of thinking their figure.

That was what happened in the Design Workshop that the Uruguayan Master Roman Diaz gave on Purranque 2007. The goal: To design a fish. Every attendant defined their own objectives and goals for their figure: that it should be symmetric, that it should stand like it was jumping out of the water, or that it could float for a while on water, or be a goldfish, or swordfish with its spur, etc etc. The next day we discussed about all of this, what objectives were achieved, what had to be abandoned, problems appeared for the type of base chosen for the goal.

It was clear, as Roma says in his blog entry, that experience played a fundamental part on the results obtained, the choice of a base was fundamental to get the needed paper for every part of the figure and to develop the details desired, but also that choice came with new problems and difficulties to be confronted (I remember a base, fish base I guess , chosen for a swordfish, which made impossible to get a symmetric double pointed fish tail). Details as the color changes or variation on the folds were discussed in the group and teached us the importance of the second and third lecture of a finished prototype, making the design process a living, evolutioning, dynamic, and group-able activity.

Work from the heart of the figure towards the outside and, if the forced changes made to lose the main goals and objectives, start again and test a different base. This could be done until the point where one works only with Crease Patterns on his head, and knows what geometry could allow the presence of a head, a dorsal flap, an ellipsoid and moving body, or that extra paper for the gills. A level that Nicolas Gajardo, young wonder of Origami Chile, seems to be achieving.


Another fantastic example was given by Polo Madueño (Argentina, in first picture to the left), who, while we were talking, took his objective's sheet of paper and improvised a great fish mask, really simple, really expressive, so suggesting that it made unnecesary any further detail or realism to look at it as a real fish, ready to jump on our face and talk us about its home at the bottom of the sea. If we play attention, it is possible to read every one of his objectives:

  • Oval body
  • Long flaps
  • Pointy tail
  • Big eyes
  • With volume
  • Open mouth


amazingly, his figure achieved almost all of them, and the result was an unique piece of improvisation and elegance. An style that now look to me as one very interesting and deep from an artistic point of view.

I left the workshop with the feeling that design is not an impossible goal, or a permanently postponed one, and that for reaching it is necessary to fold a large number of figures, study the CPs and confront it like an test and essay process, which demands a good dose of patience and will; so sad that I could assist only as a listener, since I've missed the first session. But maybe was a good thing, time will come to think in my own designs.

Thursday, March 15, 2007

Memories on a Convention at the end of the world IV


Fauna


Hernan Sandoval and Sebastian (aka the "Cabro Grande & Cabro chico"), serious candidates to the "Unbreakable Couple" Convention's award.

however, Toño and Kissy definitely got it ...

Oscar (from Peru) and behind Danilo, head of Origami Chile, inspecting everything.

Roman Diaz, main character.

Heinz Strobl, sharing protagonism.
Both absolutely low profile and helping geniuses...